
Quick Tip: Halloween Photography
October 01, 2013
The ideal jack-o’-lantern photograph... means a careful balance of trying not to overexpose the candles, or underexpose the outside of the pumpkin…
This article was originally published on April 15, 2011 and has been updated to include current product information.
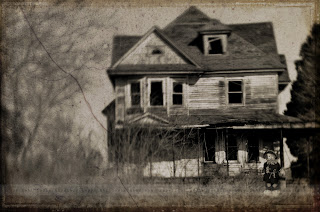
Halloween is right around the corner, and what a great holiday for photographic inspiration: From cute kids in costumes to spooky haunted houses; eerie glowing jack-o’-lanterns to pastoral pumpkin patches – Halloween offers an endless variety of unique subjects.
Here are a few photographic tips to make the most of this Halloween:
Low-Light Photography
Much of what defines the spooky quality of Halloween tends to be in the dark, whether indoors or outdoors. Typically, this is where flash photography can come in handy. However, the bright light of a flash may not work here. In fact, this might be one holiday when it’s better NOT to use a flash in a dark scene.
There are several techniques you can use to take great shots in low light – without relying on a flash:
High ISO Settings
The higher your camera’s ISO, the greater its sensitivity to light. Maximum ISOs on current EOS cameras can be anywhere from ISO 6400 or above. In low light, try settings like ISO 1600, 3200, and higher.
Working with higher ISO levels does result in increased noise. Fortunately, modern digital SLRs offer very effective High ISO Noise Reduction technology. This can even be adjusted on most recent Canon EOS cameras, allowing different levels of noise control, including (on some cameras) a powerful Multi-Shot Noise Reduction option.
Wide Apertures
Wide apertures are identified by their lower f-stop values, for example: f/1.2, f/1.4, f/1.8, f/2.0, f/2.8. At these f-stops, more light is entering the lens through its larger aperture opening. Try to shoot at the lowest f-stop your lens will allow and the image will be brighter, without resorting to flash use. Lenses like Canon’s extremely affordable EF 50mm f/1.8 lensare an excellent way to get started in available-light photography.
Be aware that wider apertures/lower f-stops also results in shallow depth of field within your images. That means your subject will be sharp, against a blurry background and foreground. Therefore, critical focus is more important at lower f-stops. Unfortunately, that can be even more challenging in dim lighting – so double check your image focus by zooming in on the camera’s LCD after each shot, or whenever possible.
Be aware that wider apertures/lower f-stops also results in shallow depth of field within your images. That means your subject will be sharp, against a blurry background and foreground. Therefore, critical focus is more important at lower f-stops. Unfortunately, that can be even more challenging in dim lighting – so double check your image focus by zooming in on the camera’s LCD after each shot, or whenever possible.
Slow Shutter Speeds
Shutter speed is measured in fractions of seconds, but can also be set to last several seconds, minutes, or even hours. Slower, or longer, shutter speeds let more light into the camera – resulting in a brighter image, with no flash.
However, slow shutter speeds also result in potentially increased image blur – both from subject and photographer movement. While you can't necessarily control subject movement, there are ways to minimize blur from your own movement handling the camera. When shooting handheld, your slowest 'safe' (blur-free) shutter speed should match your lens focal length, literally: A 16mm wide-angle lens only needs about 1/15th sec.; a 50mm lens needs about 1/60th sec.; a 200mm telephoto needs a much faster speed of 1/200th sec.; and an 800mm super telephoto lens requires at least 1/800th sec. shutter speed. If you follow that general pattern, your images should not have blur from photographer movement.
You also have Canon's Optical Image Stabilization on your side -- assuming you have an Image Stabilized (IS) lens. These lenses are very forgiving; each IS lens gives you up to four full stops of stabilization. With IS turned on, you can shoot with that 200mm telephoto at 1/60th or even 1/30th sec. shutter speed with little or no blur caused by photographer movement.
Another way to minimize blur with long exposures is to shoot with a tripod. This will eliminate blur caused by photographer movement with any lens, at any shutter speed (however, moving subjects may still be blurry). If you don’t have a tripod, fake it: Set your camera on a stable surface, or prop it on something while shooting such as a fence post, mailbox, table, or whatever is handy, flat, stable, and the right height for what you need.
Setting the Mood
Embrace the mood of your Halloween scene, whether it’s dark and spooky, or cute and playful:
Pumpkin patches are a perfect place for a family portrait. It’s a great way to use background details to create a sense of time and place that will give your photos context.
Look for the details – in costumes, decorations, bags of candy, etc – that help capture the spirit of the Halloween season.
Try B&W, sepia, or other types of tinted photography for a unique look. This may be adjusted in-camera through the EOS Picture Style settings, or you can create the effect while editing your images in Digital Photo Professional (or your preferred image editing software).
Experiment with lighting. For example: Use red ‘party’ bulbs for unique room lighting; or try lighting your costumed friends and family with flashlights (the under-the-chin flashlight angle works especially well for a scary portrait effect!)
Time Lapse movie mode is another cool one to consider. It shoots video at much lower frames-per-second rates and resulting videos show the passage of time much faster. Some compact Canon PowerShot digital cameras offer this built-in. If you have this feature, set the camera on a tripod and try to capture some fun time lapse videos: A child changing into their full costume; carving pumpkins; an evening’s worth of trick-or-treaters grabbing candy from a bowl; or whatever other activities you can think of.
Photographing Jack-o'-Lanterns
Jack-o’-lanterns are a challenging, but very rewarding subject to photograph on Halloween. There are just a few tricks to getting that perfectly eerie glowing pumpkin shot:
Turn Your Flash Off
Direct flash will completely overwhelm your jack-o’-lantern. Turn it off, and use the low light shooting described techniques above. If you have a tripod handy, the long exposure/slow shutter speed will work very well – mainly, because there is no chance of subject movement causing image blur (unless your pumpkin rolls off the table!).
If you absolutely need additional light from a flash, dial the Flash Exposure down a stop or two. This is possible on most Canon Speedlites; you can also adjust Flash Exposure for EOS and PowerShot built-in flashes, using the Flash +/- settings in camera. After reducing the flash output, if you’re using an accessory Speedlite with bounce capability, try bouncing your flash by redirecting the flash head to a wall or ceiling. Or, if you can’t swivel the flash head (such as with a built-in flash), then consider diffusing it with a small sheet of wax paper or a scrap of thin white fabric.
If you absolutely need additional light from a flash, dial the Flash Exposure down a stop or two. This is possible on most Canon Speedlites; you can also adjust Flash Exposure for EOS and PowerShot built-in flashes, using the Flash +/- settings in camera. After reducing the flash output, if you’re using an accessory Speedlite with bounce capability, try bouncing your flash by redirecting the flash head to a wall or ceiling. Or, if you can’t swivel the flash head (such as with a built-in flash), then consider diffusing it with a small sheet of wax paper or a scrap of thin white fabric.
Bouncing, or diffusing the flash will soften and reduce its light output, adding to the exposure without overwhelming the scene. You may have to experiment with different bounce angles, diffusion materials, and exposure levels before finding just the right combination.
Expose for the Candles
The ideal jack-o’-lantern photograph shows the inner glow of the candles, as well as the carved pumpkin face – which means a careful balance of trying not to overexpose the candles, or underexpose the outside of the pumpkin so much that you lose all detail.
Start with the candles: Put multiple candles in the pumpkin cavity to add as much ‘glow’ as possible. Use the spot, or partial spot, exposure metering option in your camera (indicated by a single dot, or circle, in the center of the Exposure Meter Icon), aimed directly on the glowing candles – this will help prevent them from overexposing. You can lock in this exposure reading by pressing the AE Lock button (the asterisk icon on back of your camera) or switch to Manual exposure (M) mode, dial-in the speed and aperture that indicate proper exposure from the Spot reading and leave exposure set there.
Start with the candles: Put multiple candles in the pumpkin cavity to add as much ‘glow’ as possible. Use the spot, or partial spot, exposure metering option in your camera (indicated by a single dot, or circle, in the center of the Exposure Meter Icon), aimed directly on the glowing candles – this will help prevent them from overexposing. You can lock in this exposure reading by pressing the AE Lock button (the asterisk icon on back of your camera) or switch to Manual exposure (M) mode, dial-in the speed and aperture that indicate proper exposure from the Spot reading and leave exposure set there.
For the rest of the scene, try lighting the outside of the pumpkin with a warm, soft light source that will match the feel of the candles. A low-wattage lamp with a shade; a heavily diffused flash (try putting a piece of red, orange, or yellow colored gel/cellophane in front of the flash for added warmth); a string of Christmas lights; or even other candles – these are all great ways to add just enough light so you will see detail on the outside of your pumpkin without over-powering the glow of the candles within.
Try Bracketing
If possible, try bracketing your exposure. All EOS cameras allow taking three bracketed exposures (many high-end EOS models, such as the full-frame EOS 6D and EOS 5D Mark III, allow setting up to seven bracketed shots). Most of our digital SLRs allow a 3-shot bracket, with up to two stops of exposure adjustment (the EOS-1D/Ds line allows up to 7 shots with +/- 3 EV). Start by over- and under-exposing 1 full stop, and experiment from there. Between all of the bracketed shots, you’re sure to get one that has just the right balance of highlight and shadow.
Summary
As you see, the tips for great Halloween photographs are pretty simple. Really, it all comes down to two key elements: Variety and specificity.
In other words, there are a lot of different activities and subjects to capture in this holiday that is at once playful, cute, scary, spooky, comforting, and odd. However, because each subject may have a different mood, you will get the best results with a specific goal in mind as to the look/feel of each new image.
Challenge yourself to set a mood – whether through lighting, use of colors,or framing and composition. Halloween is a great holiday for experimenting, so shoot it all, and look for as many unique points-of-viewas possible!
The CDLC contributors are compensated spokespersons and actual users of the Canon products that they promote.
All images are copyright Scott Alexander, Damian Donach, Andrew Pfaff, Erika Silverstein, Chuck Westfall
No comments:
Post a Comment